


This is one of those super curious projects that any DIY and woodworking enthusiast wants to do as soon as they discover it. A cube trapped inside a wooden cube, a piece of wood that seems almost as impossible as the impossible dovetail joint. Some even say it is a wooden puzzle, but in this case, solving the puzzle would not be how to get the inner cube out of the large one, but how to make it.

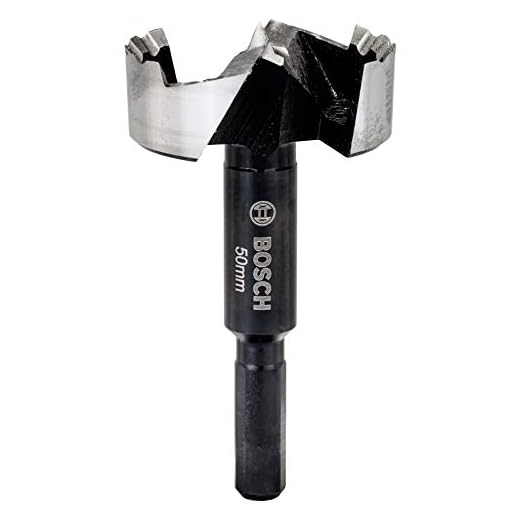
In this woodworking project, we see how to make a cube inside another wooden cube. Using mainly a 50-millimeter Forstner bit and a drill press. This process requires precision and patience, but it is easy to get it right the first time. Of course, I show you both the successes and the mistakes I made.
Prepare the Wooden Cube
Before starting to drill, it is very important to use a wooden cube where all sides measure exactly 7 cm and are perfectly perpendicular to 90 degrees to each other.
I had a wooden “strip” with a side of 7cm x 7cm with perfect 90-degree faces. So I cut a 7cm long piece on the miter saw. And I have to admit that I needed to make small adjustments on the miter saw and cut several pieces until I got a perfect one.
Sure, we can use a cube of another size and a Forstner bit of another size, but those are the ones I used.
It is necessary to find the exact center of at least one of the faces of the cube.


- Measure and Mark the Center of Each Face:
- My first problem was that I had sanded the wooden cube, and the vertices were not clearly defined. No problem, I used a trick to find the center of each face: Each side of the cube measures 7 cm, so half is 3.5 cm. I placed two boards (which add up to a thickness of 3.3 cm) and brought the cube closer to draw parallel lines to the sides of the cube’s face near the center. This gives me a perfectly centered square on the face.
- That small square is very tiny and does not allow drawing the diagonals with much precision. I should have made a bigger one.
- Mark the diagonals of a face:
- With the small square drawn, it is time to draw the diagonals on one face of the cube. These lines are essential to adjust the depth to drill with the Forstner bit to create a cube that does not come out but gives the impression that it can. Note that I drew a very small square. It would have been better to make a larger square since it would have allowed me to draw the diagonals more precisely.
As we see, I focused on finding the center of one face of the cube rather than drawing the diagonals correctly. If I had focused on drawing the diagonals, I would have drawn a larger square, and then the center of the face would have been given by the diagonals.
Adjust the Drill Press
To do a good job, we need a high-quality drill press whose spindle lowers without play and without wobbling. With a bad drill press, it will likely be challenging to achieve a good result.


- Prepare a drill press table:
- As a drill press table, I used a plywood board, fixing it with a couple of clamps. And I used a wooden strip as a lateral guide, one with its faces perfectly at 90 degrees so that the front face was perfectly at 90 degrees with the surface of the plywood board.
- Check the verticality of the drill bit:
- With a twist drill bit and the help of a square, I checked that the spindle lowered perfectly at 90 degrees with the surface of the worktable. It’s as simple as resting the square on the board and the drill bit, rotating the square about 90 degrees around the bit, and checking it again.
- Adjust the position of the cube in the Drill Press:
- The twist drill bit is only used to check the verticality of the spindle. Once checked, I can change it to the 50mm diameter Forstner bit.
- I place the wooden cube under the bit, make sure the tip falls exactly in the center I had marked on the cube, and adjust the lateral guide against the cube.
- I also adjust and secure a stop next to the cube with a wood clamp. This way, I ensure that whenever I change the position of the cube to drill, I will put it back in the correct position to drill the next face of the wood.
Adjust the Depth Stop
The trick to this project is to correctly adjust the depth stop to avoid drilling too deep with the Forstner bit or stopping too short.


- The trick to adjusting the drill depth stop:
- The first part of the trick has already been done, and it was drawing the diagonals of the cube.
- With the cube centered under the Forstner bit, I lower the bit to only mark the face with a circle.
- The mark made with the bit cuts the diagonals. When we place that marked face of the cube perpendicular to the board, the cut of the diagonal with the circle gives us the drilling depth. Well, we really adjust the depth stop so that the bit is a millimeter or two above.

Once we have the depth adjusted, we can start drilling all the faces of the cube. It is important to clean the generated shavings so they do not get in the way when positioning the wooden cube. And it is also important to decide the order in which to drill, as it affects the cleanliness of the inner cube’s vertices.
Decide Which Faces of the Cube to Drill First
I think starting to drill the faces with the parallel grain was a mistake. It is better to start with the faces against the grain. If I drill the parallel grain faces first, when I later drill against the grain, the vertical wood fibers do not have support at the edges of the cube and bend outward, forming a burr.


If I drill against the grain first, the vertical fibers cut well because they are always inside the hole I am making. Then, when drilling the faces with parallel fibers, barely any burr forms at the edges since the fibers are already cut at the edges.
Also, when drilling the last faces against the grain, which requires more effort from the bit, I had to drill the last face in stages and more carefully than desirable to prevent excessive effort from loosening the inner cube.
Release the Inner Cube Trapped in the Outer Cube


Once five faces are drilled, the inner cube may start to move as the sixth face is finished. At this point, it is crucial not to drill too deep to prevent the cube from coming loose completely, which could cause it to get stuck and the workpiece to jump with the force of the bit.
The inner cube must be carefully released using a knife to cut the corners, always cutting in a way that the knife does not slip. It is about cutting slowly and safely, without forcing it.
If we cut while trying to follow the grain direction, we will avoid splintering at the wood vertices.
Sand the Inner and Outer Cube
The final step is to sand the entire set, a task that can be uncomfortable and requires patience. Ensure that the inner and outer cubes are smooth and well-finished. Sanding the outer cube is easy, but holding the inner one while sanding is something to do with calm and patience.
Making a cube inside a cube requires precision and patience, but the final result is a curious and attractive wooden object. Although I made some mistakes, adjustments and corrections improved the result. It is also a woodworking project that is very easy to repeat once we have made the first one.