
To make this pallet wood planter for the garden, I didn’t just use pallet wood; I also used a pine board I had in the workshop. I made this planter simply to see how the pallet wood would look after planing it with our homemade thickness planer and didn’t want to complicate things by thinking of a “fancy” way to join the boards, so I decided to use this simple system of square dowels and slots, which is very easy to do if you have a router table.
How to Prepare Pallet Wood

There are two videos in this post on how to make a pallet wood planter.

The best thing about some pallet projects like this one is that you don’t need to dismantle the wooden boards. You can just cut the pieces you need with a jigsaw.

As you can see in the photos, the planed pallet wood looks quite good, almost like new wood.

The biggest problem is that it might have nails or pieces of nails that are not easy to see, which means if you want to plane it, you risk damaging the planer blades. That’s why I recommend running a small metal detector over the boards before planing them. I’ve had this detector you see in the photo for years and had only used it for fun, but it looks like I’ll be keeping it handy now.
Another problem is that the boards can be warped, making them difficult to plane, as the warp can cause significant resistance when passing through the planer. Out of about twenty-five pieces of board that I planed, I only had this problem with a couple that were a bit twisted. I’m referring here to when I plane the faces of the pieces, with them in a vertical position. In the video, I talk about the problem of planing the edges, with the wood horizontal in the thickness planer and without a guard.
How to Make the Planter with Pallet Wood:
As we saw in this post and in the video of the first part of this woodworking project on how to make a planter with pallet wood, for the sides we need to plane the pallet board pieces until the thickness is equal to the groove we routed in the legs.
The bottom boards and the top frame boards don’t need to fit into any groove, so we don’t need to adjust the thickness too much and can be content with a couple of passes on each face. Even so, we need to ensure that these boards are all the same thickness, especially the top frame boards, or they won’t be flush when making the miter cuts. To get the boards to fit, I had to make many passes with the homemade thickness planer. Next time I make a planter like this, I think I won’t complicate things as much and will use a 12mm straight bit instead of a 10mm one.

For the miter cuts, we can use a miter saw or our homemade miter guide that we use with the circular saw. For the top frame of the wooden planter, we need to cut four equal pieces. We measure one and use it to set a stop as seen in the video to cut all four to exactly the same length.

In the comments on the YouTube video, you tell me that you like to see mistakes and how they can be fixed. When making this wooden planter, I separately stained the box and the top frame with a protective stain, thinking that even with the stain, the glue would still hold (for outdoor projects, you need to use waterproof exterior glue. If it doesn’t say so on the bottle, it’s likely only for indoor use). The next day, I noticed the glue wasn’t drying, and when it finally dried, it didn’t stick to the wood. There are probably other products for gluing already stained wood, but what I had on hand in the workshop was two-part epoxy resin, so I mixed some and glued the frame to the top.
This is a project without nails and without screws!

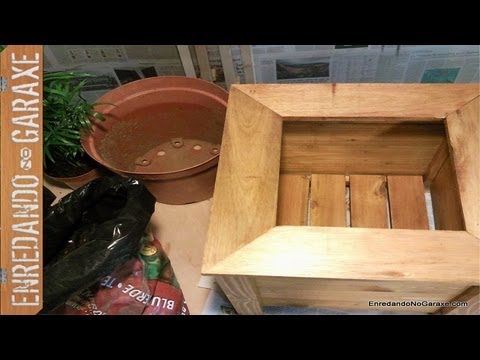
As for the plastic pot that doesn’t fit through the top of this wooden planter…. well, that was part of the design. I wanted the top of the pot to be well hidden under the top frame, which is why the bottom boards are loose and have a lot of space between them, so I can fit the pot from underneath and then easily put the bottom slats back in place.
You can see that the idea of this pallet project is to plane the boards to make the pallet wood look like new wood in the end.
I don’t know how long the wood would last with several coats of protective stain if I put soil inside instead of a plastic pot, but I don’t like the idea of putting soil in contact with chemicals because that soil might end up in the composter someday. This way, I can also remove the pot and re-treat the wood with more protective stain. Maybe I could line the inside with heavy-duty plastic, but I think I prefer the idea of using a plastic pot. I might have to remove the plant to take out the pot, but that way, I can also refresh the soil. Speaking of the plant… it got sunburned :_(. I’m waiting to see if it recovers its green color. This happens when I don’t check if it can handle direct sunlight and trust it too much.